In-depth example
This section aims to provide a start-to-finish example of a simple Down Range scenario, showcasing many different aspects of the rules.
Note that all through this example, distances are displayed smaller than they would be in real life to allow for depicting the scenario in the limited space available on the page.
Friendly forces
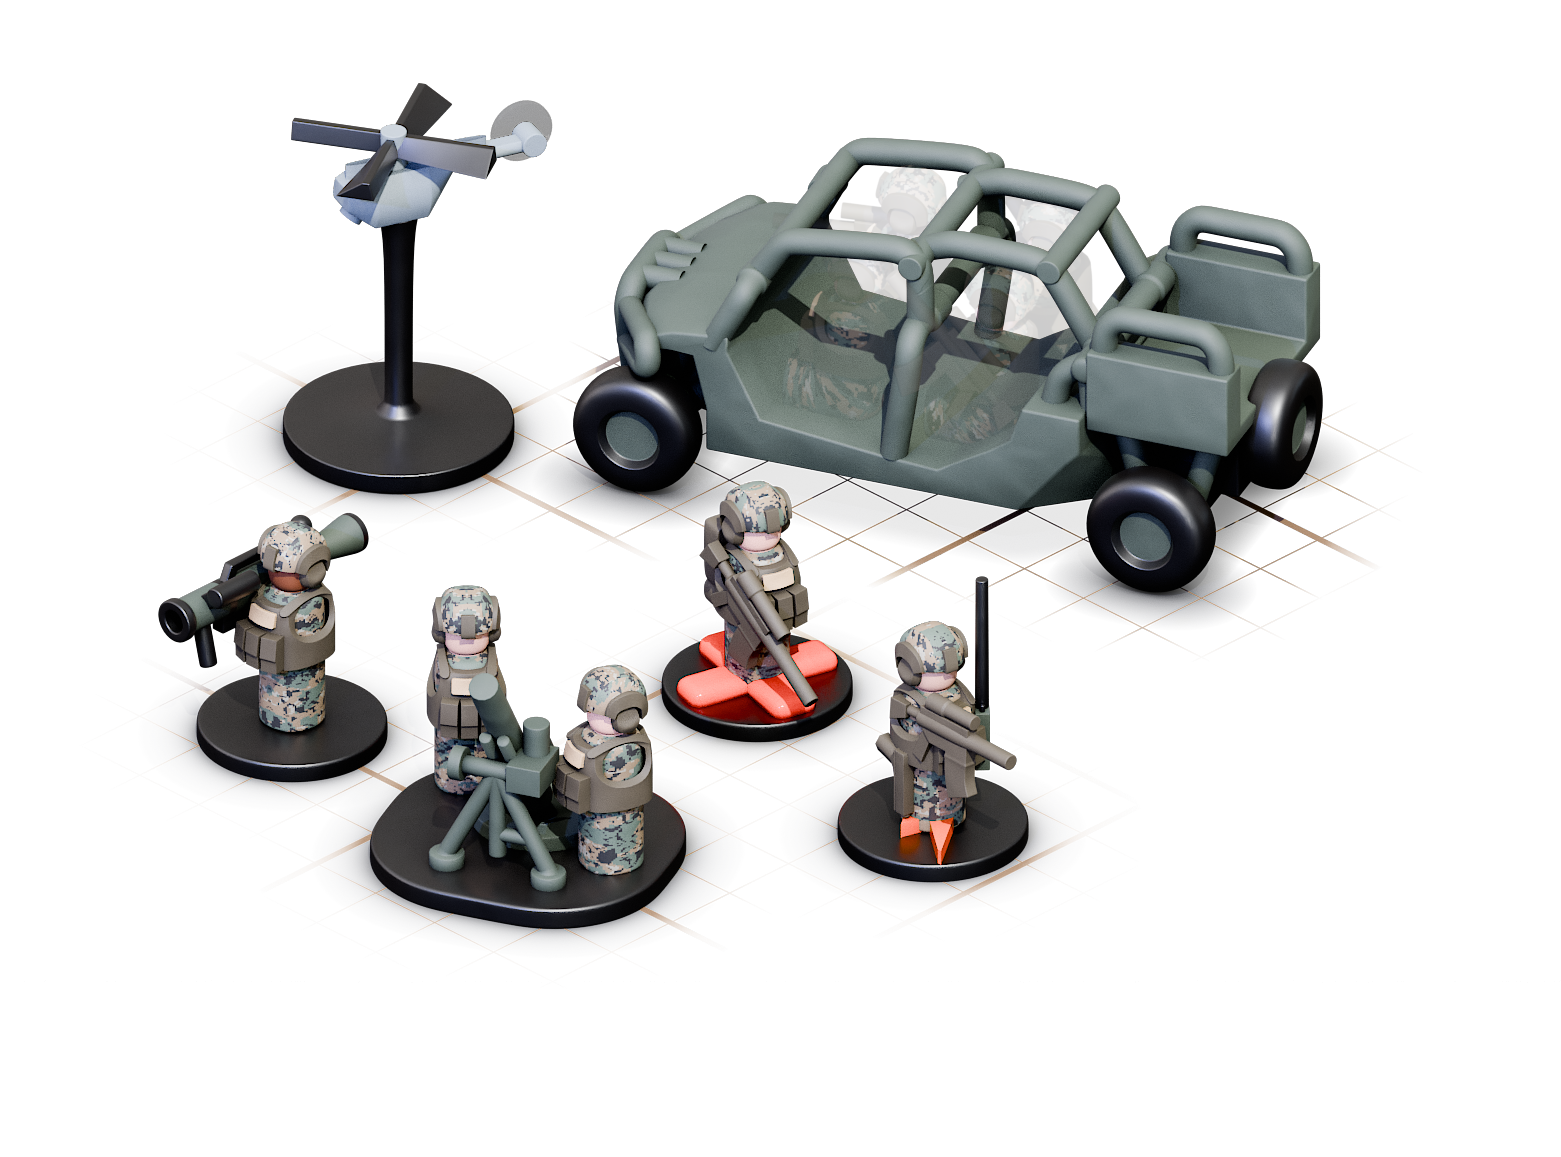
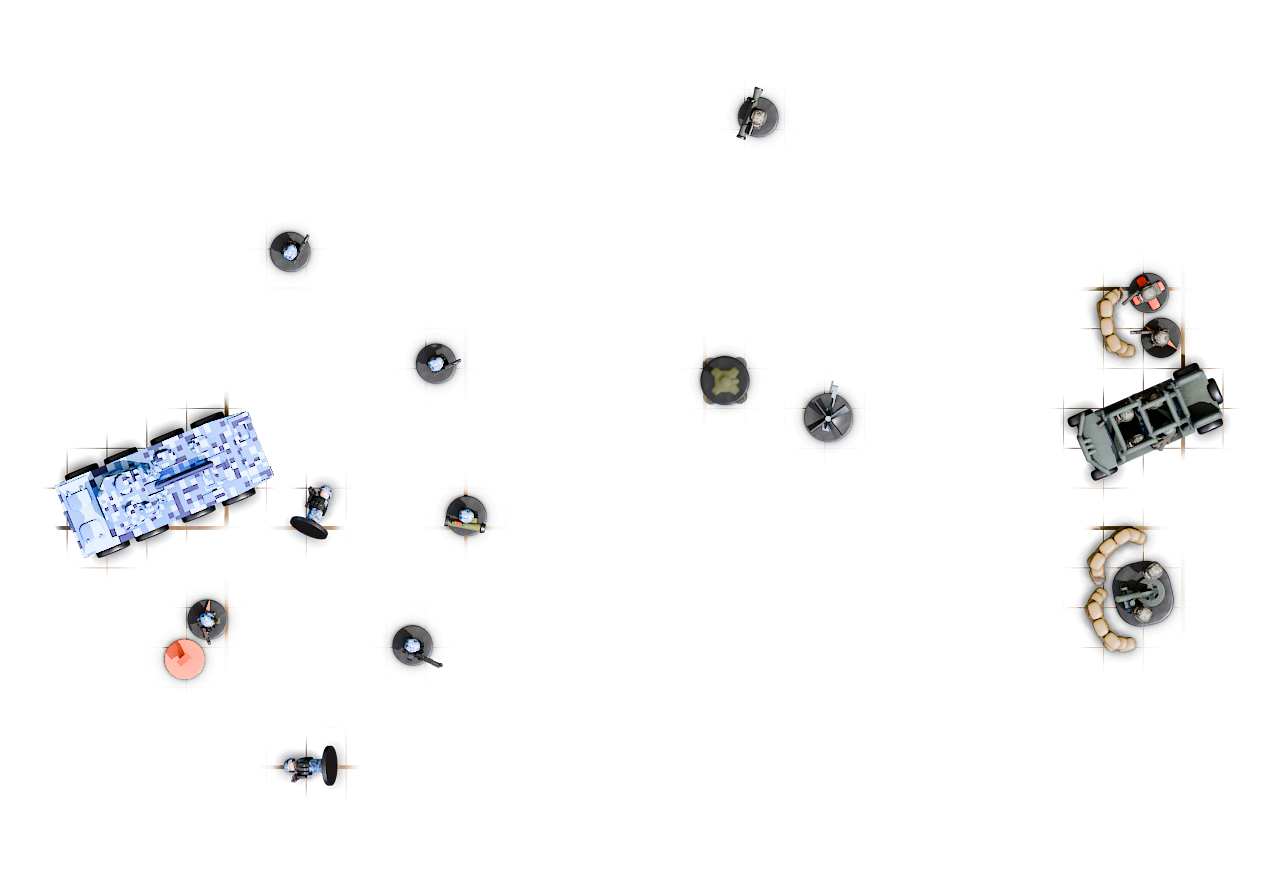
For this example, we follow the exploits of a small group of Marines. Consisting of one MAAWS gunner, a two-man mortar team with their NCO, and a corpsman, the group has made their way to the location in question on a UTV, with the MAAWS gunner riding tenuously in the back cargo area, the group's Black Hornet UAS tucked in his pack.
Thanks to this precarious transportation decision, players have agreed the UTV is only able to move at half-speed when anyone is in the cargo area.
At the outset, the Marine player rolls his  for initiative, resulting in a 5 to the other player's 3. This allows the Marine player to go first.
Friendly turn: Preparing for combat
Deciding to scope out the area, the Marines set up - the mortar tear creates a firing position, while the MAAWS gunner assists in filling sandbags around the mortar position to provide a degree of cover. The players agree that the sandbags provide both cover and concealment, although not total - enemies will have a  disadvantage to hitting the protected Marines with direct-fire weapons and indirect-fire weapons that land anywhere but head-on.
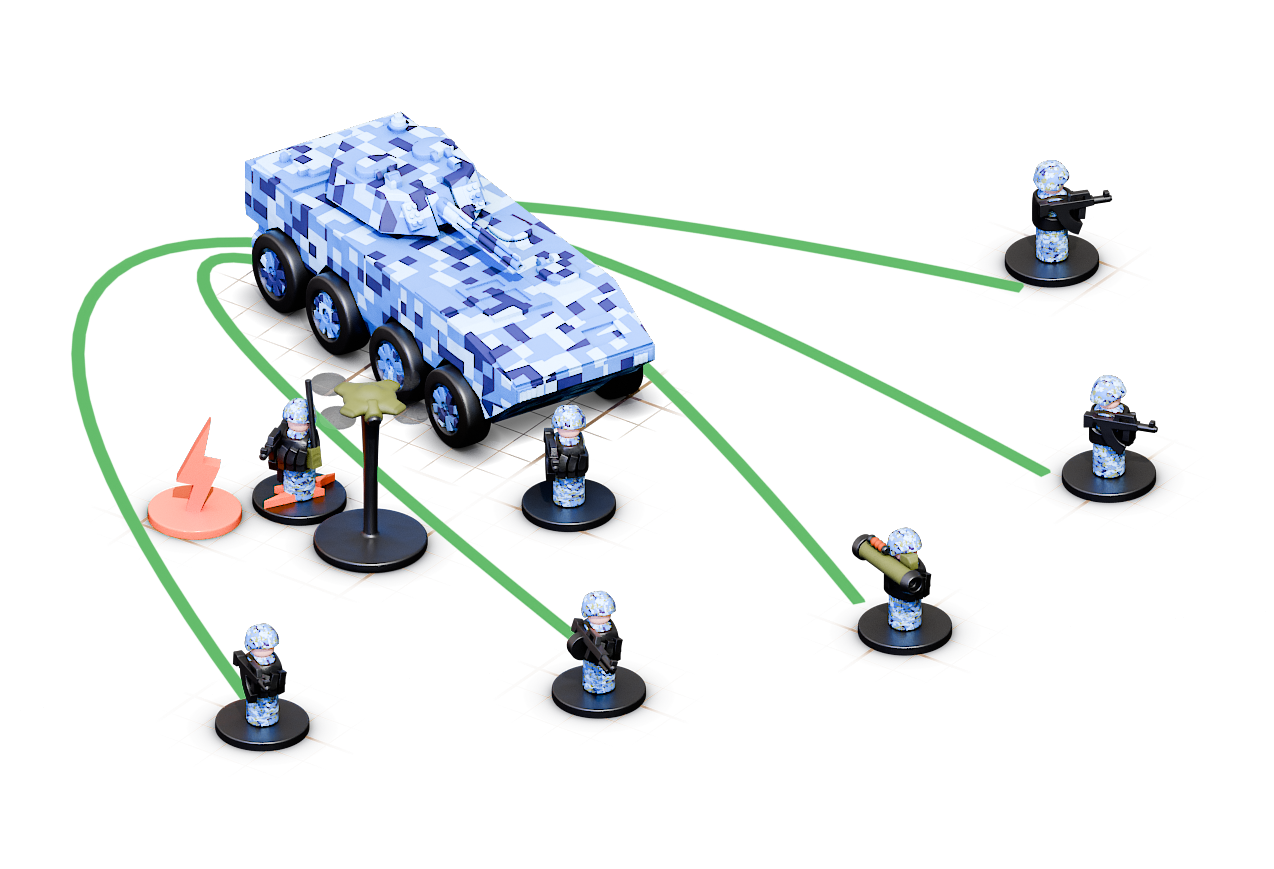
The sergeant in charge, however, decides to risk the emissions associated with remotely piloting a UAV in contested territory. The player places an emission token next to the sergeant, following the rules for unmanned vehicles, and allows the Black Hornet to enter the field from directly adjacent to the sergeant.

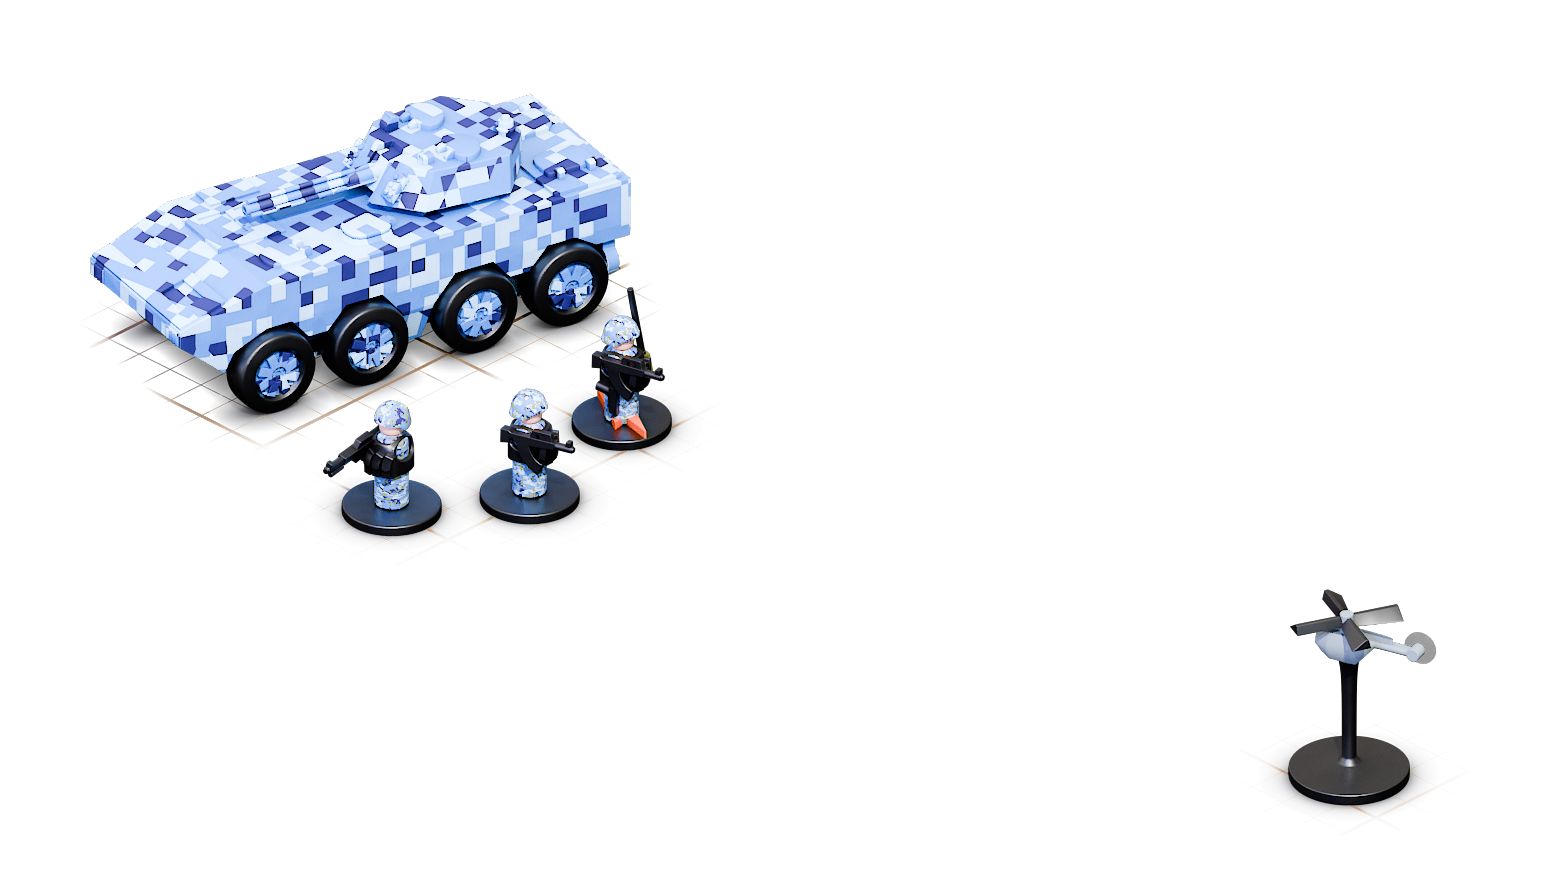
The Black Hornet, beginning its turn immediately after the sergeant, is able to move up to its maximum  move of 24". Moving over a hill (depicted by players on their sand table, appropriately, with a mound of dirt), the UAS immediately sights an enemy squad, some of its members loitering outside its ZBL-09 infantry fighting vehicle. The squad is about 30" away from the Marines, and about 15" from the UAS.
Importantly, the sergeant piloting the UAS realizes that the group loitering outside includes a PLANMC officer, likely to be in charge of the whole group. The enemy has already noticed the Black Hornet overhead, alerting them to the Marines' presence nearby - but With the mortar team already set in, the opportunity is ripe to establish an ambush.
The MAAWS gunner and corpsman set in behind nearby cover, while the sergeant, unable to move thanks to using his  focus to pilot the UAS, remains in place. The mortar team stays in place, too, allowing them to be ready to fire at a moment's notice.
Thankfully, the enemy doesn't have any electronic warfare specialists with them, or the location of the Marines would be pinpointed immediately on the enemy's turn, thanks to the sergeant emitting.
Enemy turn: Reacting to contact
Realizing there's a Marine presence in the area, the enemy player realizes he had best establish a foot-mobile screen of infantry for his IFV. Because the troops are dismounting through the rear hatch as designed, both the ground troops and the IFV can move at full speed and require no focus.
The IFV deploys its full passenger complement. Each individual soldier rusuhes out, using part of their maximum move of 8" to form a semi-circular screen around the IFV. The officer, mirroring the actions of the Marine sergeant, decides to forgo moving and focus to launch his own UAS, which moves off in the direction of the Marines. In the meantime, the ZBL-09 and its screen begin moving toward the last known direction of the Black Hornet sighting.
This round is over. The Marine player again wins the initiative roll, allowing him to go next.
Friendly turn: Setting the ambush
Observing the enemy deployment through the Black Hornet, the sergeant decides it's time to act. Stopping his  signal and allowing the UAS to return to him automatically, the sergeant orders the mortar team to fire on the enemy force. Using the process of determing an attack:
Check visibility
Even though the mortar team can't directly see the enemy, they can still make the attack, as the sergeant was able to remotely observe them through the Black Hornet.
The sergeant can pass on this observation without another signal, as he is within his move of 8" to the mortar team and can simply use his voice.
Check range
The leading edge of the enemy is within the mortar's  range of 72", so the the mortar is easily able to attack the enemy, who are all about 60" away.
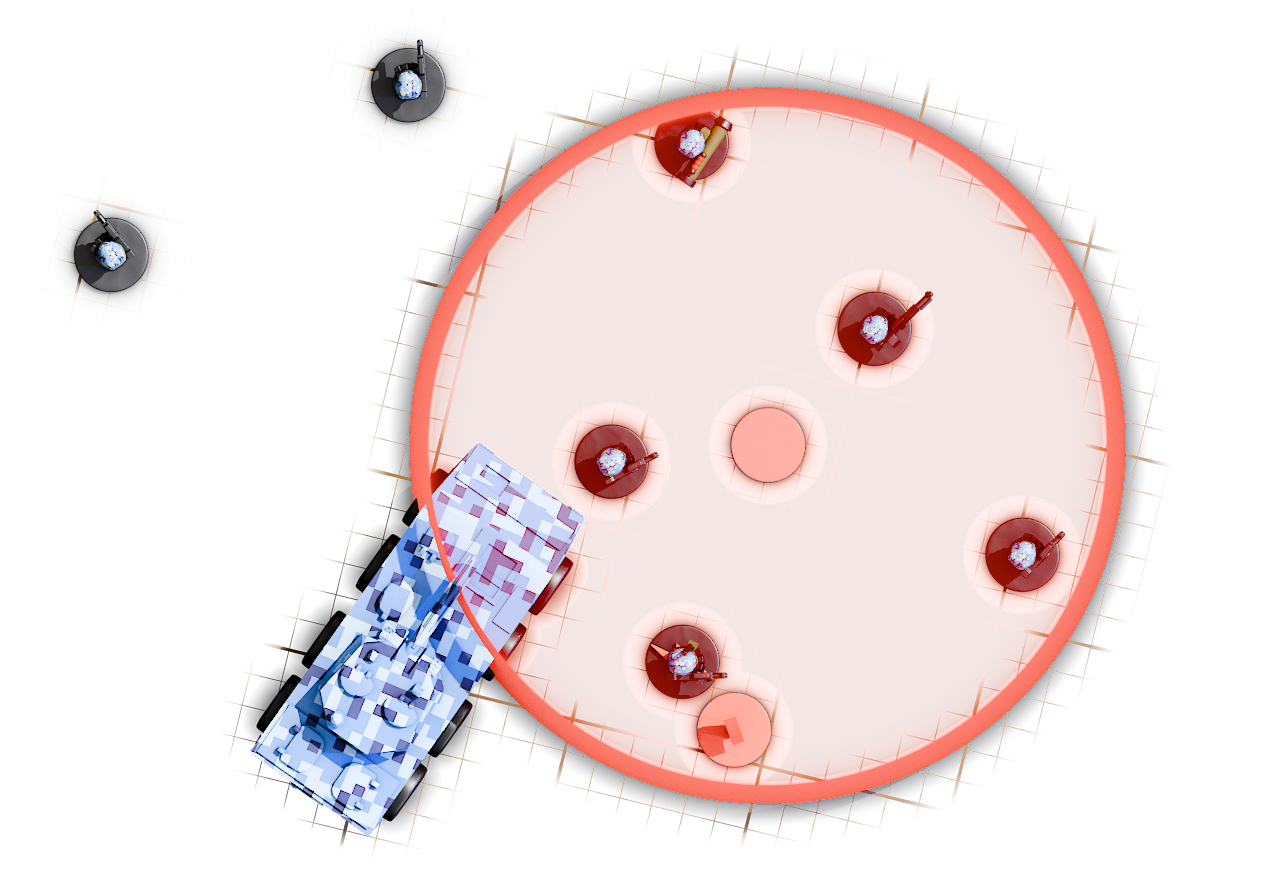
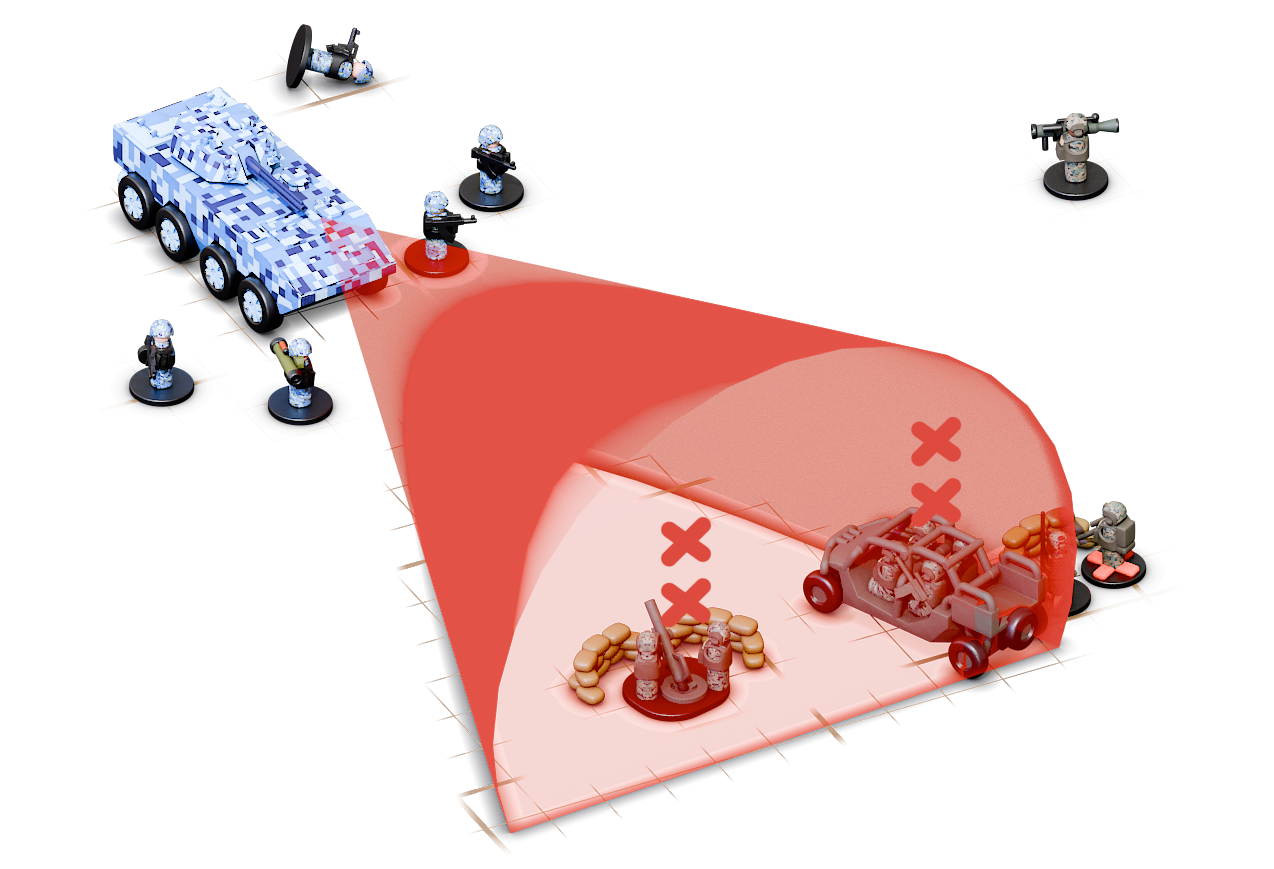
Looking to maximize casualties, the player selects a point of impact that will catch five of the enemy troops in the mortar's 12"  radius. The ZBL-09 is within the radius, but because the mortar's
  damage is
  and the IFV's
  defense is , it can't be affected.
Check difficulty
The assistant mortar operator focuses to give the gunner a better chance of hitting, adding +1 and allowing the gunner to make a  skill roll of
  +1. The mortar has a
  difficulty of 5, making this a difficult but not impossible shot.
The player rolls a 4 on the dice - adding the +1, this becomes 5, meeting the mortar's difficulty. While the player could elect to suppress the enemy instead, giving them a disadvantage on all their rolls for the next turn, this time the player is looking for lethality.
Check damage
Each enemy soldier has a defense of 5 - the basic 4 for being an average combatant, and an additional 1 point of defense for wearing body armor. Caught in the blast are the officer, an automatic rifleman, an anti-tank missileman, and two riflemen. The mortar has a damage of .
Rolling for each, the player rolls a 4 for the officer, a 4 for the automatic rifleman, a 3 for the anti-tank gunner, and a 16 for the other two. As a result, the two unlucky rifleman are killed instantly, and the players upend their tokens on the board.
If they keep moving, the enemy will likely be close enough - and over the hill enough - to be seen and targeted directly. The mortar gunners, having both had to focus, can't move. The sergeant and corpsman reposition to allow for a better vantage point, off to the side of the likely approach, and ready a  reaction.
The MAAWS gunner moves his full move of 8" to take up a position on the side of the likely avenue of approach of the ZBL-09, readying a reaction to fire when the ZBL-09 comes in range.
Enemy turn: Contact
The enemy moves closer to the Marines, and as they crest the next hill, the opposing forces make contact, with every unit in range of every other. As it has the best firepower by far, the officer uses his action to designate the ZBL-09 his  main effort.
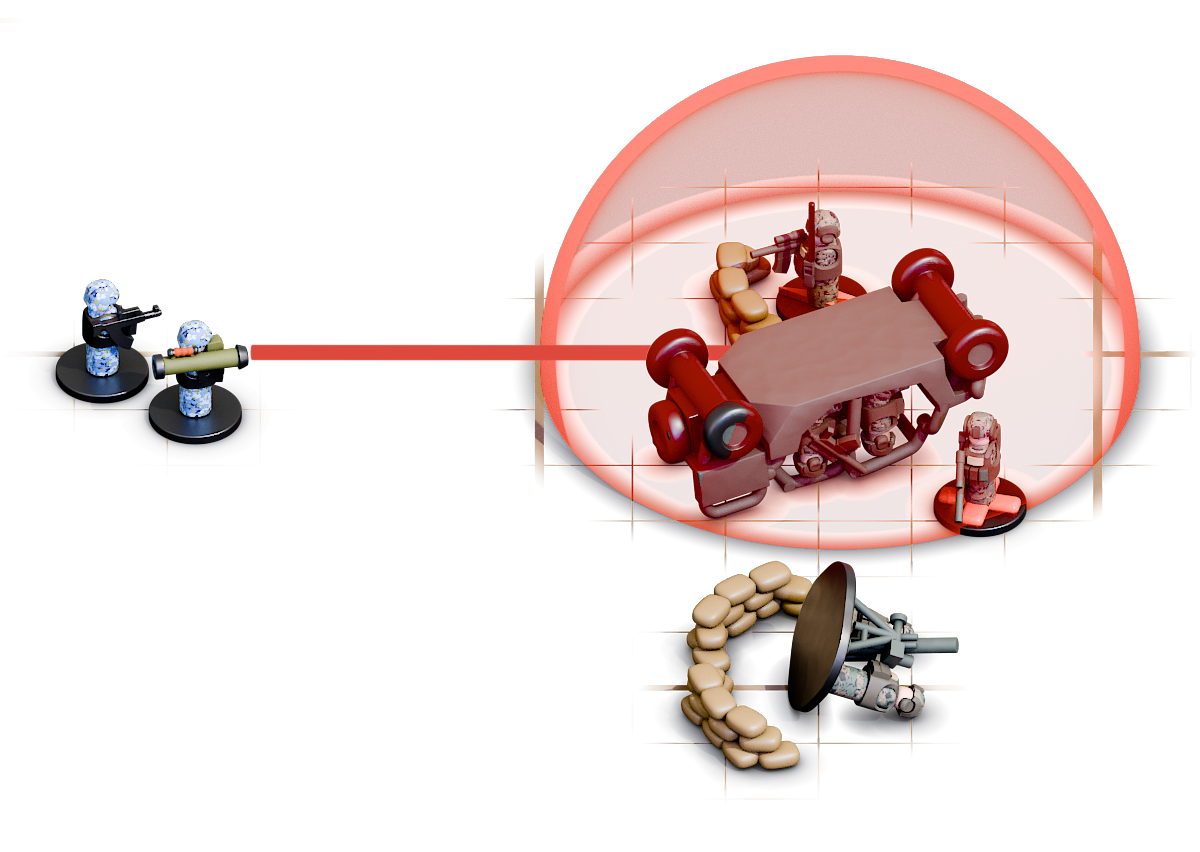
The MAAWS gunner then uses his reaction to fire on the ZBL-09 - but with a skill roll of 1, he automatically fails, and the rocket sails off harmlessly.
Automatic fire - the ZBL-09 autocannon
The ZBL-09 traverses its turret, bringing to bear an autocannon with a  fan of 4, a difficulty of 6, and a damage of . The focus of this firepower is the Marine mortar team.
The ZBL-09 has an  advantage. however, the partial cover afforded by the sandbag emplacement and dug-in mortar location gives it a disadvantage, canceling out the main effort effect.
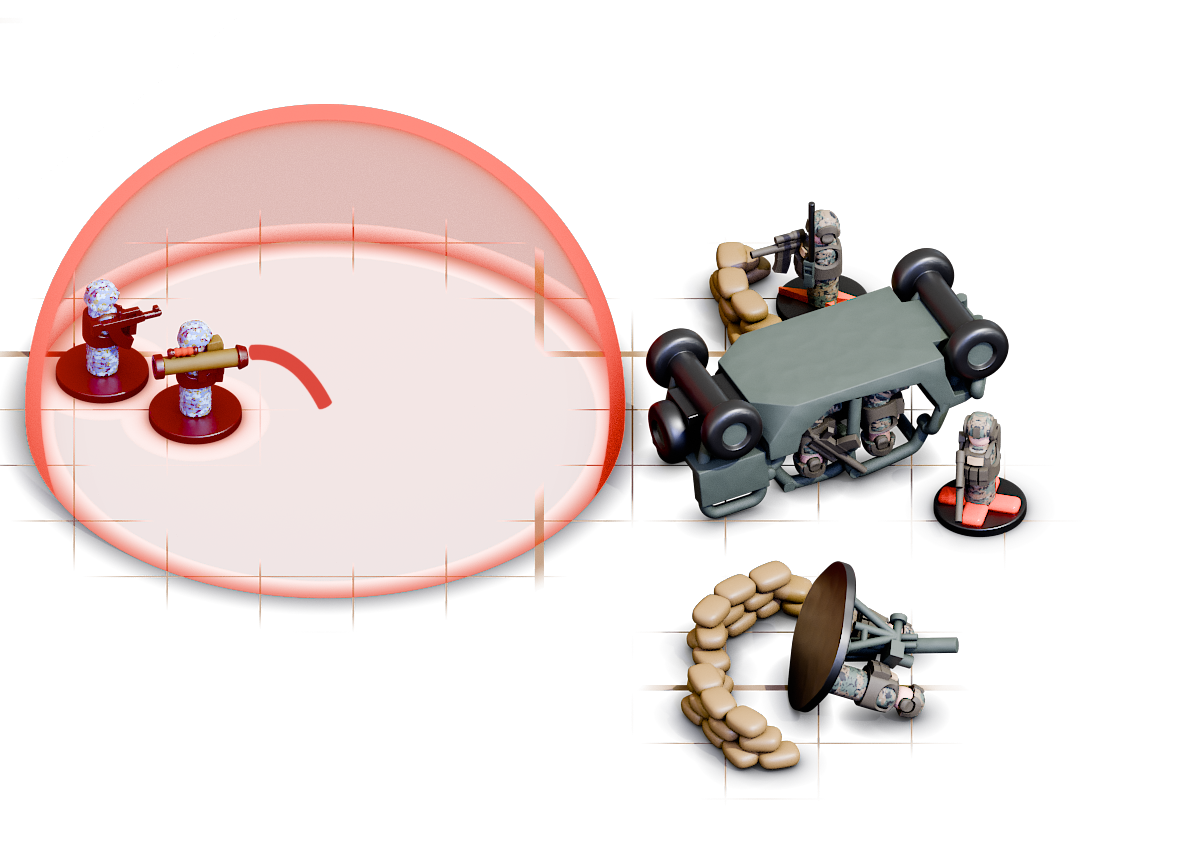
The UTV is under no such protection, however, and is within the 45-degree cone of fire, and so the ZBL-09 commander elects to fire two shots on the mortar team and two at the UTV. With the gunner inside the ZBL-09 applying his focus to the commander's attack for a total skill of +1, the attack commenses.
The commander rolls two pairs of dice thanks to the advantage: (6, 2) and a (4, 1) for skill on the UTV shots. Taking the best of each and adding one, this results in a 7 and a 5. As a result, the ZBL-09 lands one shot on the UTV.
The UTV, with a defense of , is helpless, rolling a total of 8 to the ZBL-09's damage roll of that ends in a 12. On the field, a round slams into the UTV and detonates, reducing the vehicle permanently into a heap of twisted metal.
For the first shot on the mortar team, the commander rolls a 2 - even bumped up to 3 by the gunner's assitance, this fails and the shot goes wide. The second roll is a 7, however - hitting even without the extra aid. With a damage roll of 10, it's enough to easily overwhelm the mortar team's defense of 5.
The mortar team is taken out on impact, and the mortar itself is completely destroyed.
Marine reaction
The remaining four enemy infantrymen advance, coming within line-of-sight of the surviving Marine forces. The sergeant uses the reaction he had ready to fire on the enemy automatic rifleman with his M4, and rolls a 6 on his skill to the carbine's difficulty of 3, and a 6 on the damage roll. This meets or beats the automatic rifleman's defense of 5, and he drops like a rock.
The corpsman uses his reaction to sprint, dashing up to 8" behind the UTV wreckage, trying to get close to the downed mortarmen while also taking cover.
Enemy infantry attacks
The enemy anti-tank missileman, seeing an opportunity to take out two Marines, levels his weapon at the sergeant and the corpsman. He'll be at a disadvantage thanks to the partial cover, but elects to engage anyway, especially given that he's within 8" now of his targets.
Rolling his skill of twice, he gets a 6 and a 2, and has to take the 2 due to the disadvantage. His weapon has a difficulty of 4, and so he's missed by 4. The weapon has a blast radius of 8". Per the rules on explosive misses, this allows the Marine player to choose a point (8/2) × 2 = 8" or less from the original impact point.
Handily, this is within the distance of the missileman and one of his compatriots. Since the Marine player had the most units in the blast radius, he picks that point.
Rolling the weapon's damage of for the missileman, he gets an 8, and for the nearby rifleman he rolls a 7 - enough to take them both out of the fight.
The two remaining enemy infantrymen decide to reenter the ZBL-09, using up their move and having their tokens removed from the board by players. The enemy officer, seeing that the situation is rapidly evolving, does the same.
The Marine player again wins the initiative roll.
Friendly turn: Holding back the enemy
The sergeant, realizing that the only path to survival is taking out the ZBL-09, uses his action to designate the MAAWS gunner as his main effort, and moves behind the cover over the wrecked UTV.
The MAAWS gunner, now with the corresponding advantage, rolls two dice for his skill. He's already down to only three  ammunition remaining, and uses one more for this.
Getting a 6 and a 2, he takes the highest, and the MAAWS shot is successful, impacting the ZBL-09. The IFV has a defense of , and the MAAWS rocket has a damage of too.
The Marine player rolls a 14 for the damage, and the enemy player rolls a 13 - the ZBL-09 explodes into flames, the ammunition inside cooking off and leading to a grisly sight as enemy troops stagger out, burning.
Since no more enemy troops are left, the Marine player may now take as many turns as he likes.
Treating the wounded
The corpsman, seeing that the immediate threat has passed, moves to the downed mortarmen. On the next turn, he'll be able to focus to treat the wounded, and does when the time comes.
As a medical specialist, he can roll for his skill on this roll, and rolls a 6. Using the rules for medical results, this means that the injured Marine is back up, but will suffer a permanent disadvantage and move at half speed for the remainder of the scenario.
The players duly mark this status with a token, and the sergeant moves to the site of the treatment.
The next turn sees the sergeant focus to assist the corpsman, representing, perhaps, applying pressure dressings and tourniquets while the corspman conducts more involved care. This assistance bumps the corpsman's skill on the next roll to +1, resulting in a 9 - miraculously, the Marine is restored close enough to full function for the purposes of Down Range.
On the last turn, the sergeant uses his radio to signal and call for extraction, receiving an emission token and hoping that no enemy EW personnel pick up on the transmission.